Mastering the Split Shot
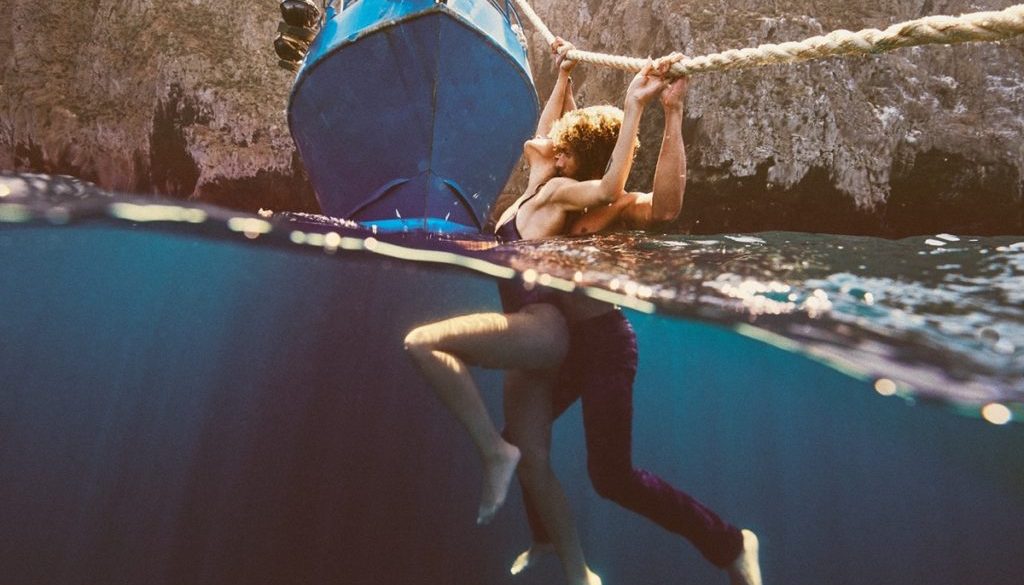
The under-over or split level image in water photography is a flex. There’s no other way to describe it. The artist is demonstrating to you that their equipment is capable of doing images most other photographers’ gear cannot. However, my fascination with splitting the levels is the narrative aspect. I believe the perspective serves to split the attention of the viewer and gives the artist a unique way to build in the “third read” of an image. It’s a niche way of telling a visual story, in the same way that time-lapse astro images appeal by showing two worlds together.
 We would not be able to readily appreciate, without the aid of imaging, the constants of two environments simultaneously bordering each other. We are trained (reasonably) to think of the surface of water as an entry point to a new universe where most of what we know as normal is now not. The split is a way of showing a seamless transition into that underworld.
Achieving this image can be accomplished generally in two ways. The first method is to purchase and utilize a dome port and the second method is to shoot the image in multiple different captures and combine them in post. For many talented photoshop artists multiple captures will give them them the most control over the end result. It also potentially requires the least amount of capital investment if you opt for a flat port. Unfortunately, I am not a talented composite artist so my route is the former rather than the latter.
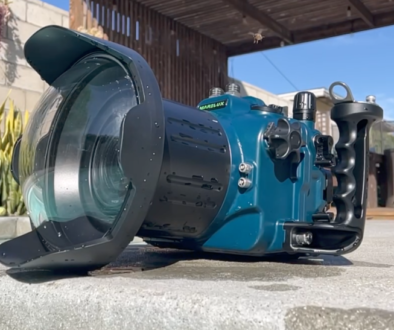
I suspect most water photographers already know the basics of dome vs flat, but for the sake of filling column inches I’ll go over the basics briefly. The beauty of the dome is that it minimizes the effects of water refraction which would cause a flat port in water to render a subject magnified at a given focal length vs in the air. The dome does have a disadvantage in that it requires your lenses to have a very good minimum focus capability because the lens is actually not focusing on the real subject but instead it is focused on a virtual image projected at a distance of 1.5x the diameter of your dome port. This nifty kick-in-the-teeth effectively eliminates a good many of our favorite portrait lenses from natively functioning inside a dome underwater.
 It also makes overall focus more problematic because moving the focus point closer to the sensor will reduce the amount of depth of field. Fully underwater, we see this often as softer corners in the image. To improve on this we stop our lenses down as much as we can afford. Since we are most likely using wide angles (roughly 15-35mm on full frame) bringing depth of field back is pretty straight forward. But when we rise to the surface and attempt the split, things get a lot more complicated in portraiture.
One of the key questions you need to answer for yourself is exactly how much depth of field you’re going to tolerate now that you’re seeing above the surface, this is portraiture after all. Assuming you’re still using the 15-35mm lens your above the water image will have a larger depth of field now that the lens is focusing on your subject in air. For me, the answer is simple- I want a lot less depth. I like to have the subject isolated away from the background lest it becomes too energetic. This isn’t always possible given various locations. I find myself shooting f/4-5.6 as a maximum in confined water… depending on the distance to the subject. One Caveat, in open water I usually allow for a deeper f-stop if only to help counteract the difficulty getting something in focus when you are floating and fighting ocean currents.
As I mentioned above, usually I stay with the 15-35mm for my splits, but lately I’ve experimented with using 24-70mm lenses. The positive is that I’m able to get better compression on my subjects but the downside is that there is practically no way to pull enough depth of field to bring the underwater portion of the image into anything resembling usable focus. It does let me shoot splits when I have a messier background in a rented pool…or if I have a pool with unprecedented clarity.
 If I have one piece of advice regarding kit, it would be to buy the largest dome you can afford. Even if it means you may have to buy a “lesser” quality lens. There is enough aberration in underwater and surface level of photography that you probably won’t even see the difference. A larger dome port will allow your lens to focus a tiny bit further out because the increased diameter translates to a virtual image created that much further away. It will also really aid in dealing with the surface line, rendering it a bit thinner than smaller domes. This is important because it’s the surface line that defines the boundary of your two worlds. But, a line that appears to be too thick can have a tendency to become a dominant feature.
 In the end, you’re going to shoot a lot of misses before you get hits. I think on average it takes 60-80 images before I find one that I like. Your mileage may vary of course. Ultimately I feel that the practice it takes to get the over under shot nailed is worth the time you’re going to put into getting it right. And if ultimately the results indicate failure, you can just take a deep breath and return to depths… in shame.
